- 1. Getting Started
- Welcome
- Installing Rosetta Theme
- Required Plugins
- Recommended Plugins
- Import Demo Content
- Updating Rosetta Theme
- Menus Setup
- 2. Customization
- Overview
- Settings
- Colors
- Typography
- 3. Content
- Categories
- Posts
- Pages
- WooCommerce
- 4. Sidebars
- Sidebars & Widgets
- 5. Theme Translation
- Translate Rosetta Theme
Rosetta Documentation
Minimalist & Typography Based WordPress Blog Theme
1. Getting Started
Welcome
Created: 04/27/2022
Last Update: 08/12/2022
By: FlatLayers
Support Email: support@flatlayers.com
Thank you for purchasing our theme. If you have any questions that are beyond the scope of this help file, please Email us at support@flatlayers.com. We will get back to you within 12 hours and help you with any issue you might have. Thanks so much!
Installing Rosetta Theme
Using WordPress Dashboard
- Download full theme ZIP package and Extract it to normal folder.
- Go to your WordPress dashboard and click on Appearance.
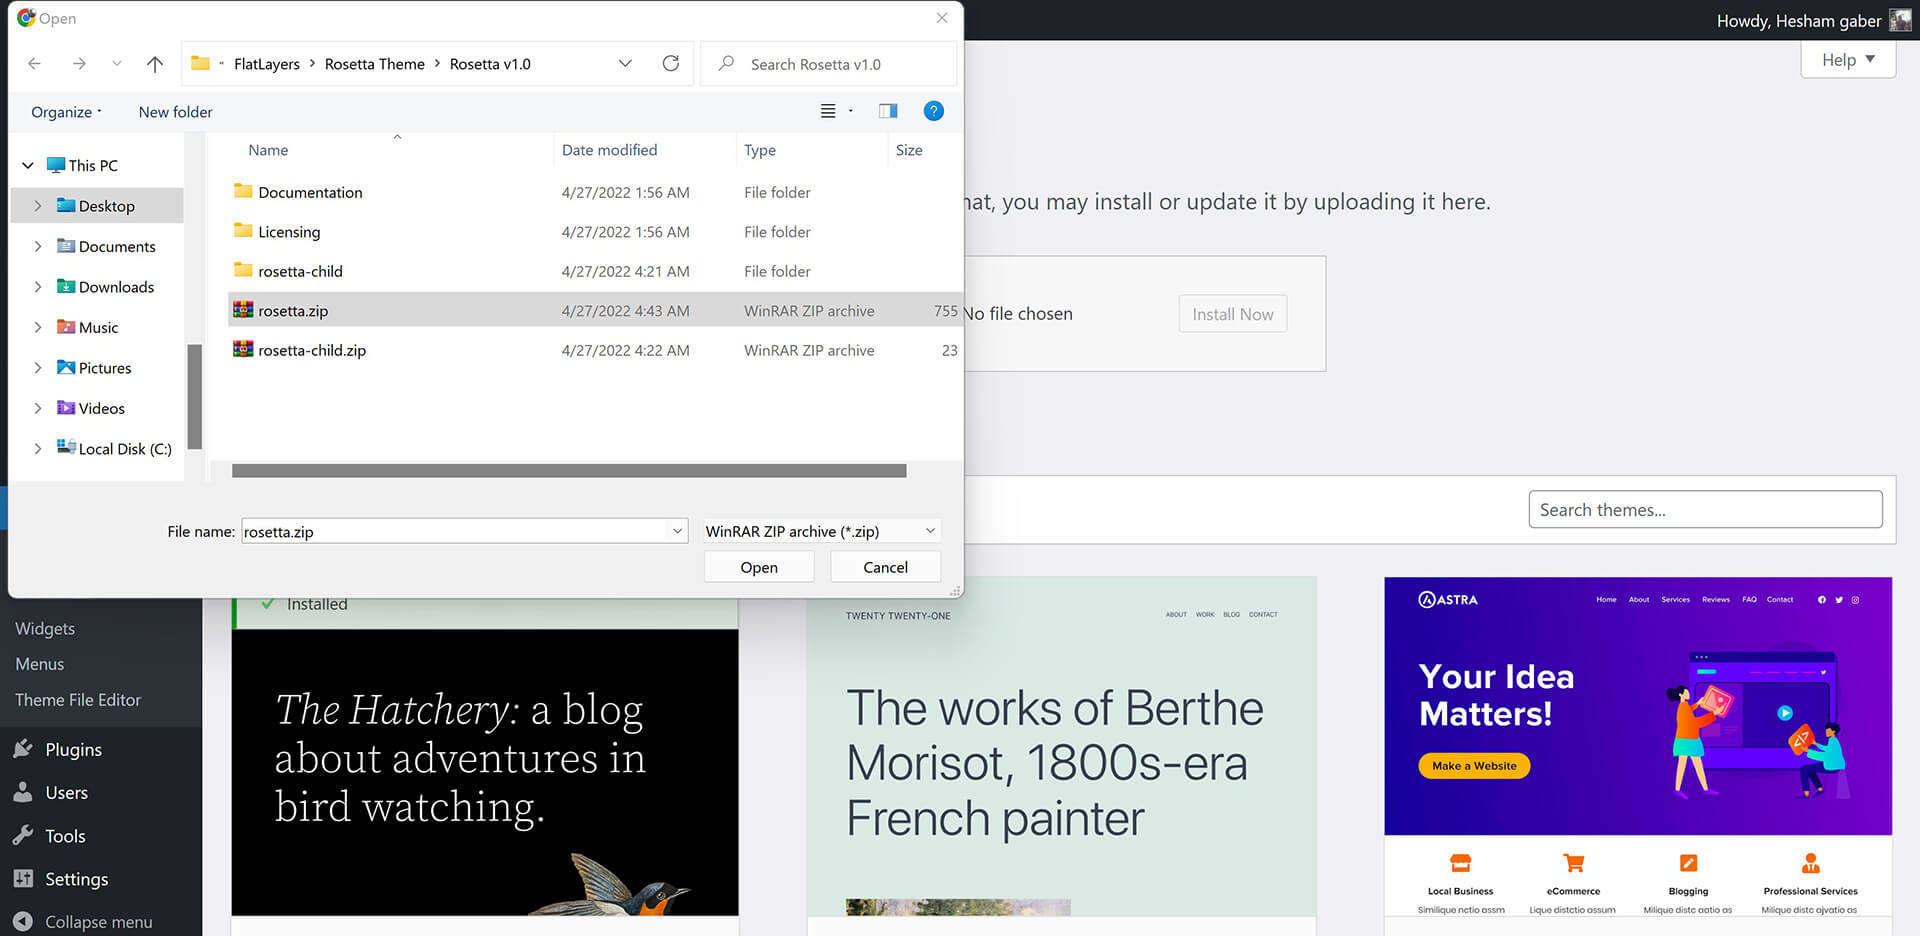
- Click on Add New Themes then click on Upload.
- Browse for rosetta.zip inside the extracted folder then click Open.
- Click the Install Now.
- After finishing installation process click on Activate the theme.
Using FTP
- Extract rosetta.zip to normal folder.
- Open WordPress instaltion directory.
- Go to /wp-content/themes directory.
- Upload rosetta folder to that "themes" directory.
You will find rosetta-child folder. It's a child theme you can edit and upload using FTP to themes directory.
Required Plugins
After installing Rosetta theme. Theme shows message to install Rosetta Theme Addons. Follow instructions to install and active them.
Rosetta Theme Addons plugin contains:
- Sharing Icons.
- Author social profiles inputs.
- Custom Widgets (Rosetta Latests Posts, Rosetta Category Posts, Rosetta IDs Posts, Rosetta Random Posts, Rosetta About).

Recommended Plugins
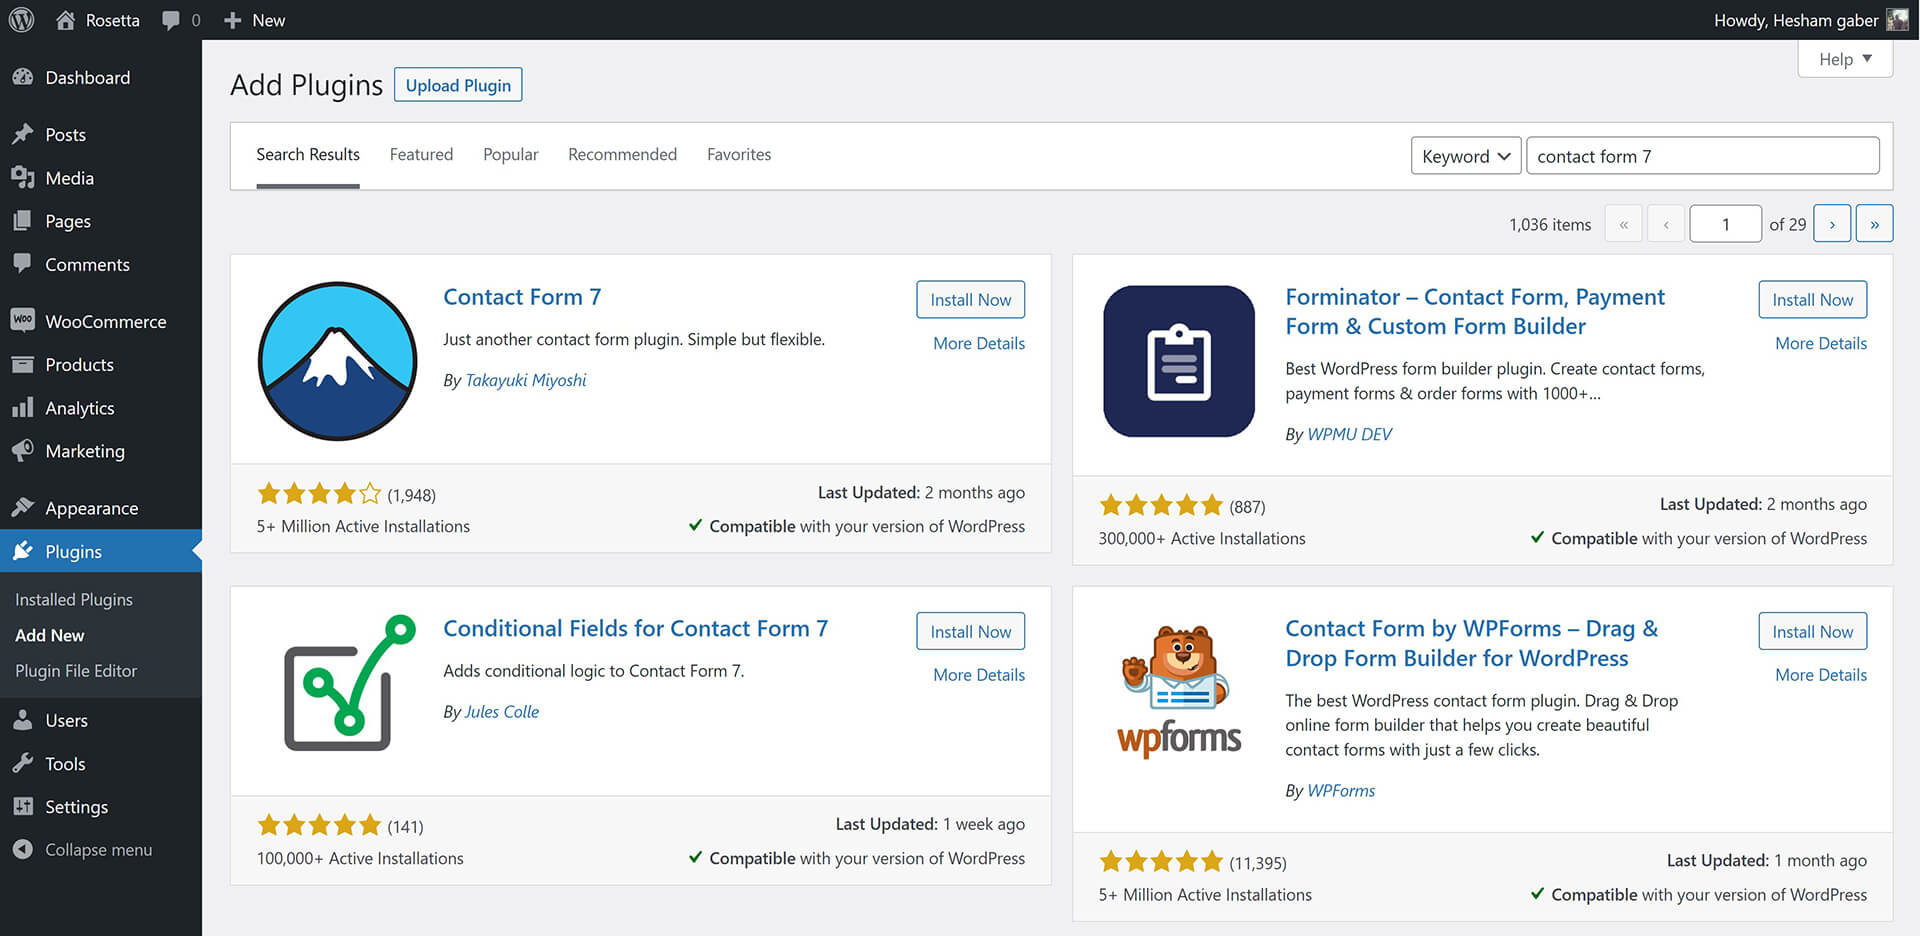
To install any plugin just go to Plugins > Add New. Type or paste plugin name and wait until it's appears then install and activate it.
Please, read any plugin documentation before using it to know how to use it correctly.
-
WooCommerce
WooCommerce lets you create your online shop. Plugin Documentation -
Contact form 7
This plugin lets you create contact froms. Plugin Documentation -
MailChimp for WordPress
This plugin lets you create subscribe froms using Mailchimp website services. Plugin Documentation -
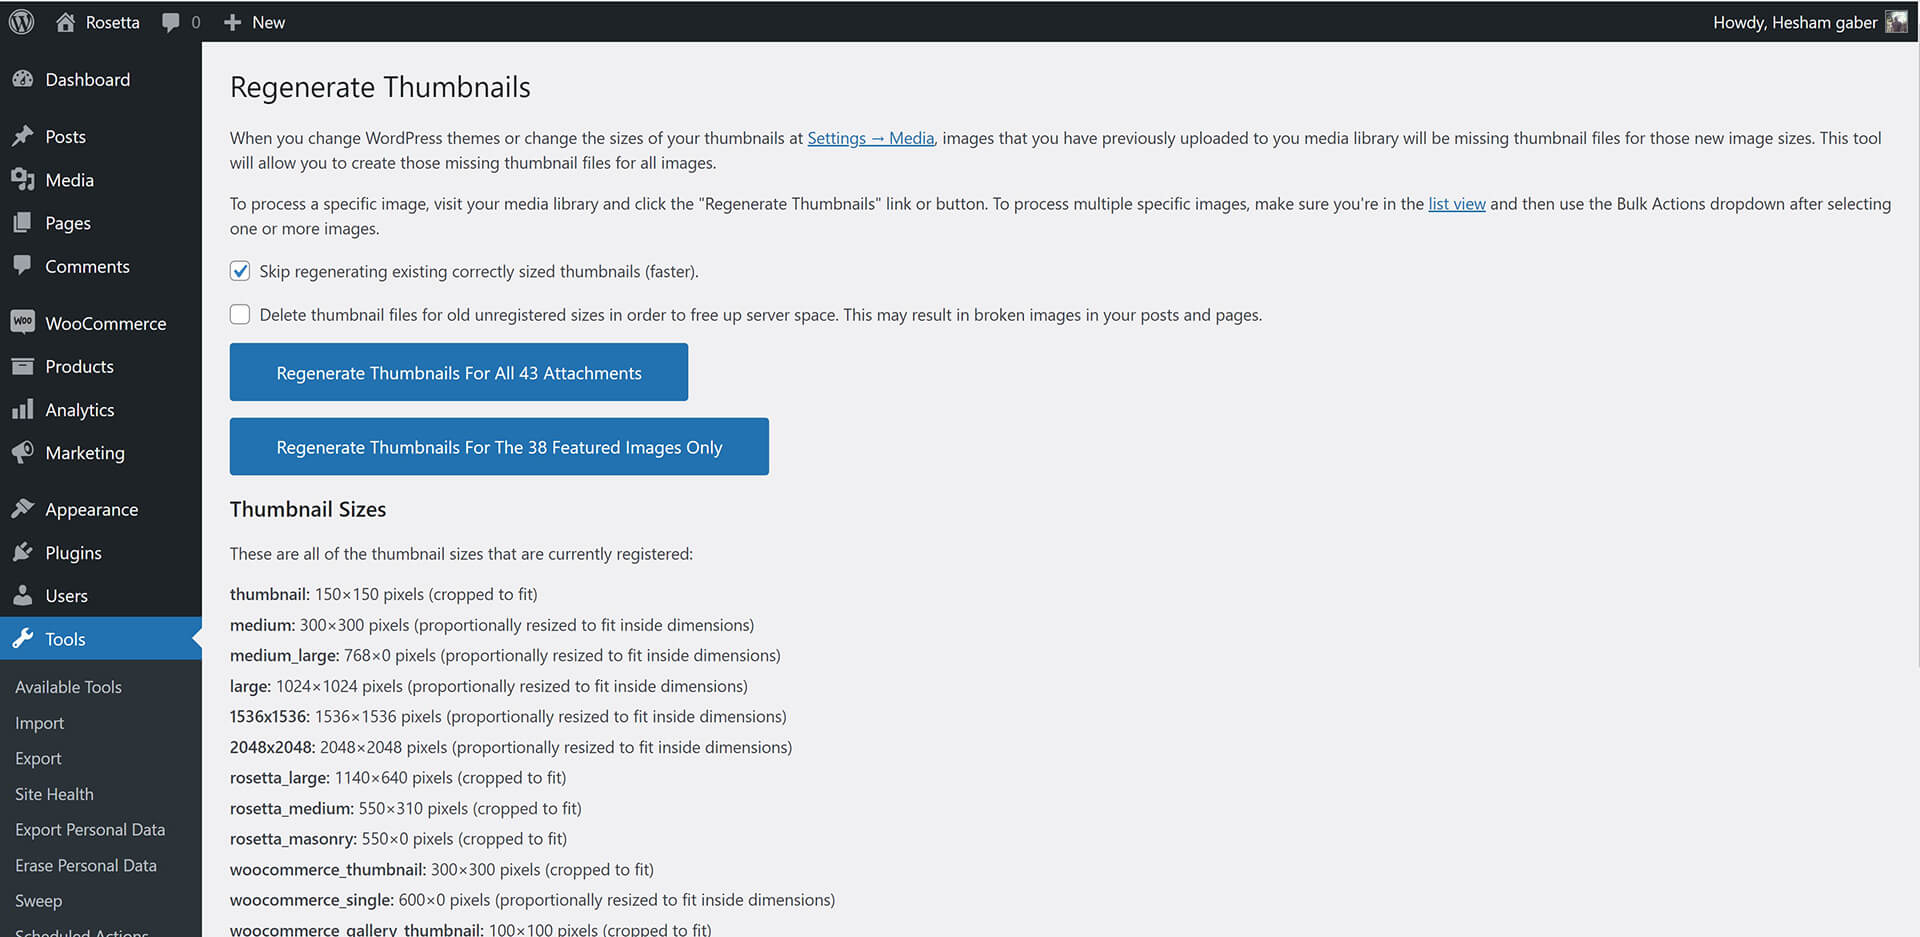
Regenerate Thumbnails
You must use this plugin if you uploaded pictures before installing Rosetta theme.
After installing and activating Regenerate Thumbnails.
- Go to Tools > Regen. Thumbnails.
- Click on Regenerate All Thumbnails and wait until it's finish.
Import Demo Content
Rosetta theme comes with XML demo content file "rosetta-demo-data.xml" you will find it inside theme package folder. To import it:
- Go to Tools > Import.
- Click on WordPress.
- Install and activate WordPress Importer plugin.
- Upload "rosetta-demo-data.xml" and import it.
Updating Rosetta Theme
Rosetta theme may be updated periodically in order to add new features and fix bugs. You have two methods to update theme.
Updating Automatically
Envato have developed the Envato Market Plugin for WordPress. This plugin automatically alert you on your dashboard when a new version of the theme is available and you can update it automatically from your WordPress dashboard. Follow upcoming steps to install and use it.
- Go to Envato Market Plugin.
- Follow instruction to download, install and activate it.
Updating Manually
- Download latest theme version from ThemeForest > Downloads.
- Extract the ZIP theme Package to normal folder.
- Go to Appearance > Themes.
- Click on Add New > Upload then install rosetta.zip.
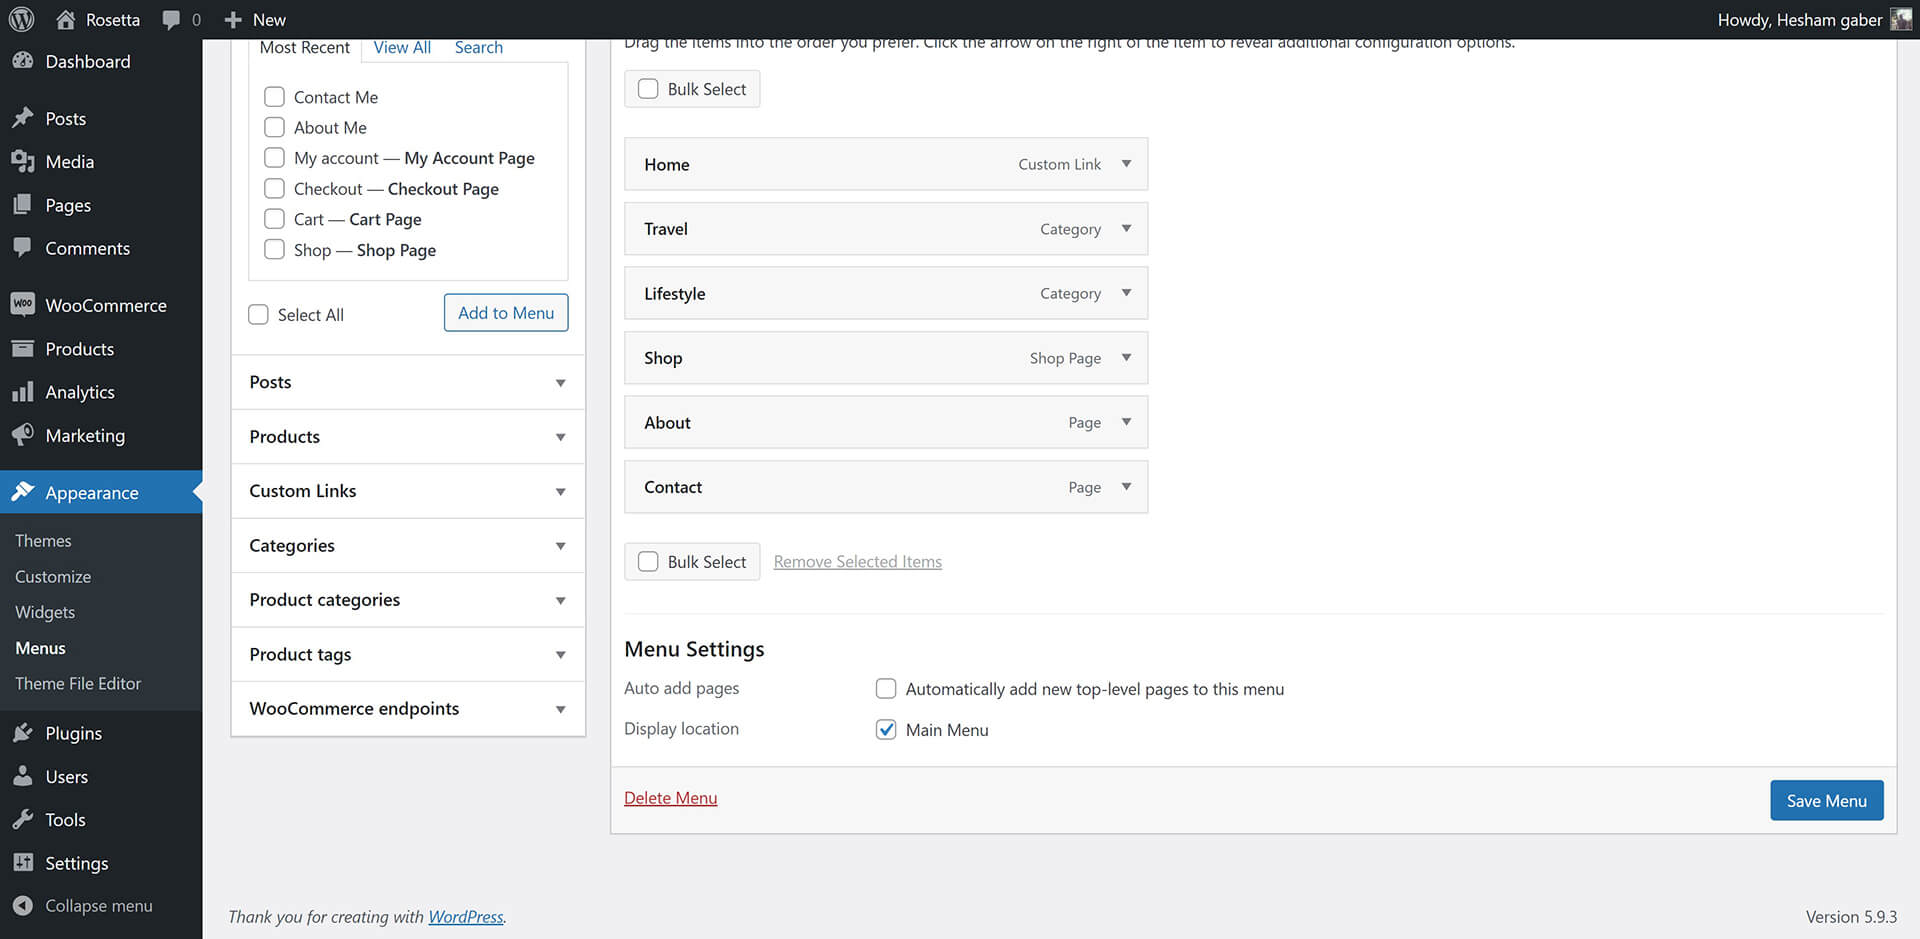
Menus Setup
Rosetta theme has 1 menu location (Main Menu).
To Create and activate Menu:
- Go to Appearance > Menus.
- Click on Create New Menu button and give it a name.
- Select Page, Posts, Categories or create custom links then click Add To Menu button.
- Select Menu Location (Main Menu).
- Then Click on Save Menu button.
You can create more menus and use them in drawer sidebar.
To know how to create and control Menus check out WordPress Menu User Guide
2. Customization
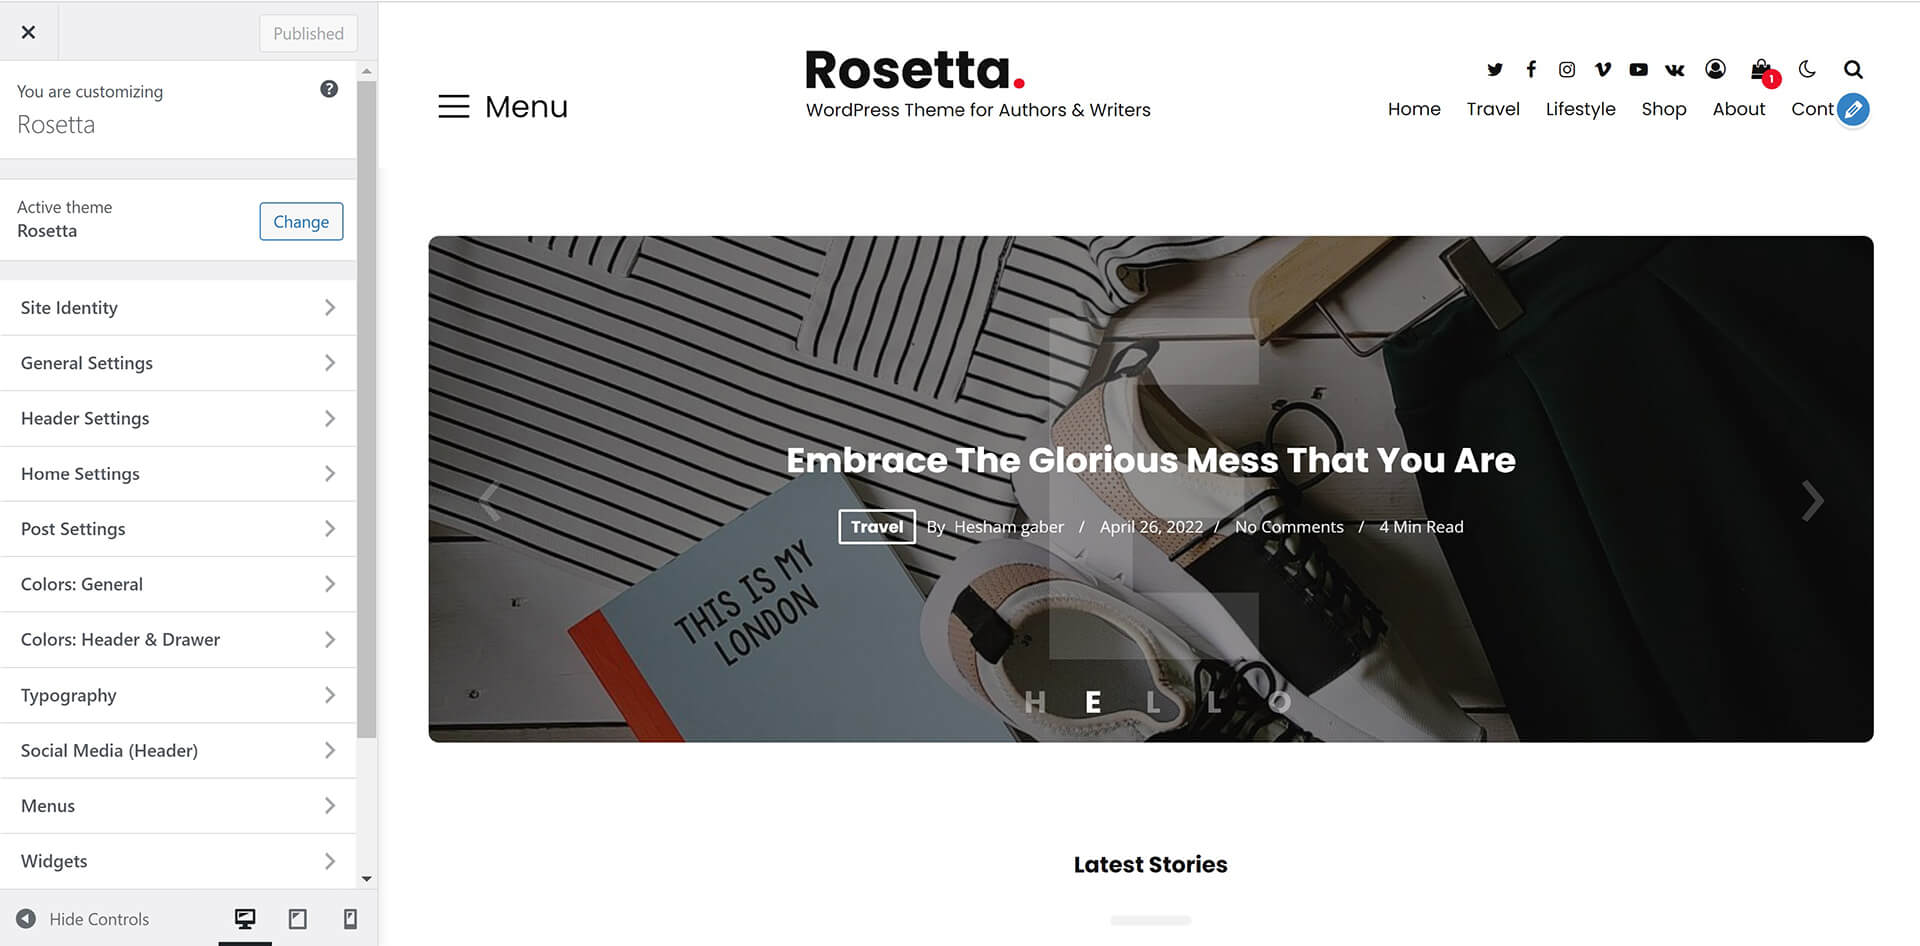
Overview
Rosetta theme powerful customiztion panel will help you to change options, colors, typography and see change in live preview before saving. Options are arranged to help you understand and use it.
Go to Appearance > Customize to customize your blog.
Here is some insturctions to use Customize panel:
- Read each option title and description to know how to use it.
- Test changes in live preview before saving it.
- WooCommerce options display when WooCommerce plugin is activated.
Settings
List of all settings sections in customize panel
1. Site Identity:
- Adding Site title
- Adding Site tagline (description)
- Adding Site icon (favicon)
2. General Settings:
- Show/Hide all thumbnails in website
- Select pagination style
- Select categories archive layout
- Select author archive layout
- Select search results layout
- Select tags & other archives layout
- Add Copyrights
3. Header Settings:
- Adding logo
- Adding dark mode logo
- Enable/Disable dark mode
- Set dark mode as default mode
- Enable/Disable Fixed Header
- Show/Hide Drawer on desktop
- Show/Hide social media icons
- Show/Hide search
- Show/Hide WooCommerce cart icon
- Show/Hide WooCommerce account icon
4. Home Settings:
Full Control of homepage style.
- Select homepage layout
- Select featured posts layout
- Adding featured posts IDs
- Adding featured categories slugs
- Select featured posts count
5. Post Settings:
- Select related posts type
- Show/Hide author section
- Show/Hide related posts
- Show/Hide sharing section
- Show/Hide editor picks section
- Show/Hide author meta
- Show/Hide date meta
- Show/Hide reading time meta
- Show/Hide tags meta
- Show/Hide comments meta
- Show/Hide Previous & Next Posts
7. Social Media (Header):
Add your social media links and it will display automatically in header and footer like demo.
Please add full link starting with (https://) not just username.
Colors
Colors customize sections allow you change all theme colors in Light mode.
Dark Mode has only one color scheme.
Accent color display in both light and dark mode.
1. Colors: General
Allow you to change general colors, backgrounds, headings, buttons...etc
2. Colors: Header & Drawer
Allow you to change Header and drawer sidebar colors, backgrounds, menu, submenu...etc
Typography
Rosetta theme is designed based on a powerful typography ratio.
You can use any font from Google Fonts.
Please, read typography options carefully.
3. Content
Categories
- Go to Posts > Categories.
- Add/Edit category name, slug and description.
- Select category layout.

Posts
Gutenberg Editor Support
Rosetta theme is fully support gutenberg editor.
to know how to use gutenberg editor please check this tutorial: How to Use the WordPress Block Editor (Gutenberg Tutorial).

Featured Image
Add featured image for all posts even gallery posts to display it in blog and archives pages.
Featured image size must be ( 1140px width X 640px height ) or more.
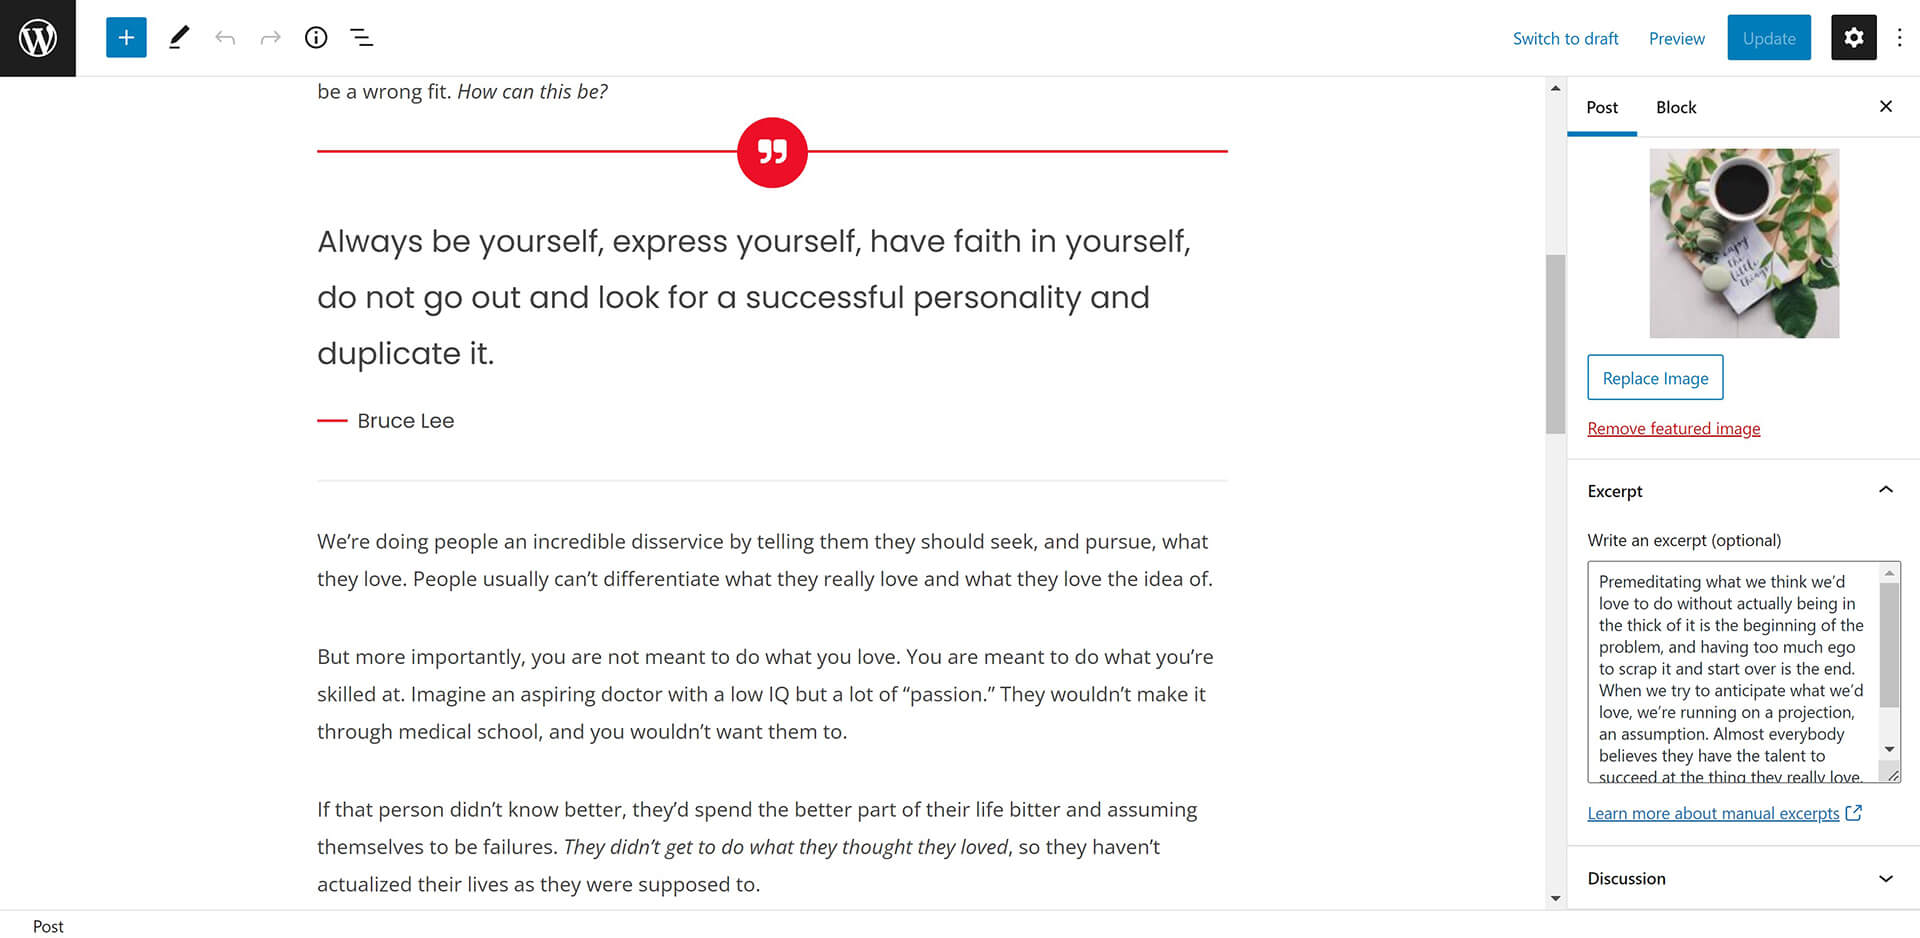
Post Excerpt
Excerpt is generated automatically with first 70 words.
You can add excerpt manually. please see the image below.
Pages
As in posts section you can create page using gutenberg or classic editor.
Also you can add featured image.
Disable Comments
Default pages have comments section.
To hide comments section from page :
- Scroll to Discussion section and remove Allow comments selection.

WooCommerce
To use WooCommerce plugin in Rosetta theme.
Install it and follow setup instructions
Plugin will setup required pages (Shop, Cart, Checkout and Account ).
Please, read WooCommerce Documentation. It will help you to know all tips required to create your shop.
4. Sidebars
5. Theme Translation
Translate Rosetta Theme
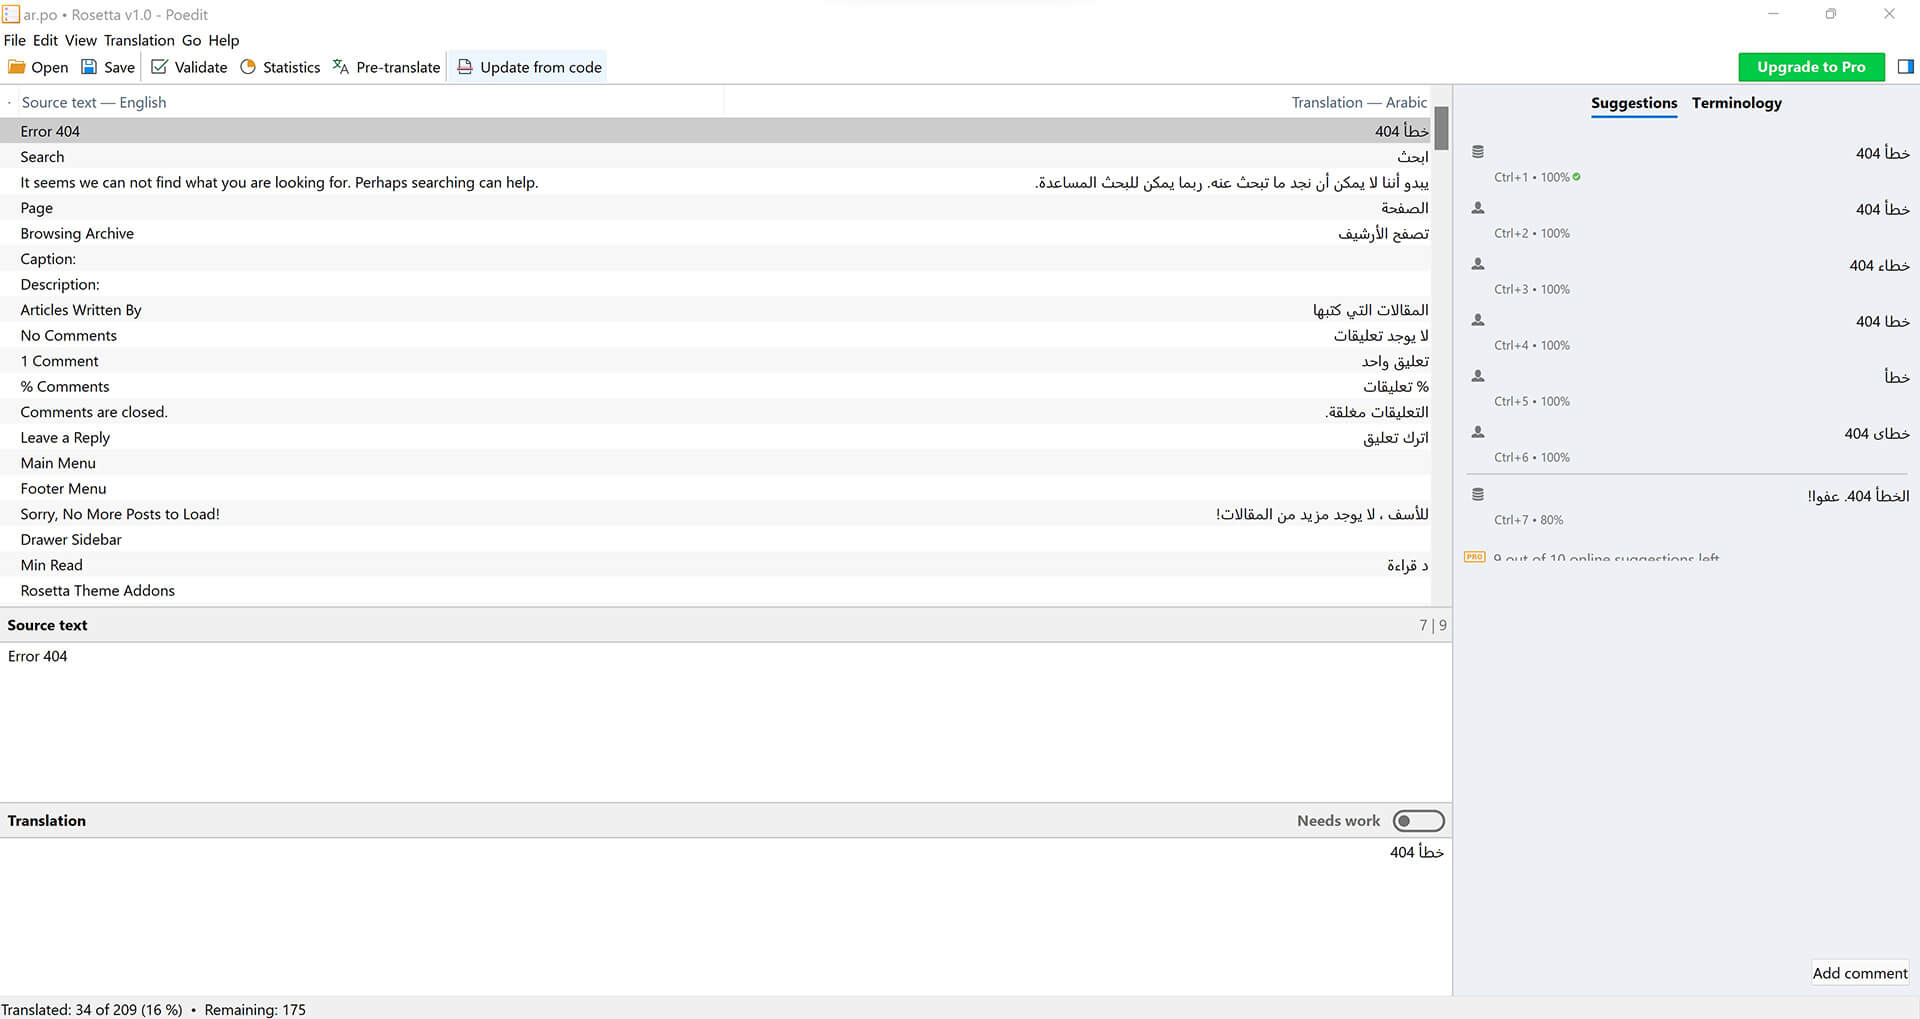
You can translate theme static words like "Latest Stories, Min Read, Related Articles...ect" using Poedit Free Program.
- Download and install Poedit on your computer.
- Go to extracted theme package folder > rosetta > languages.
- Open rosetta.pot file using Poedit program and click on Create new translation button.
- Select translation language.
- Find words you want to translate and add translation.
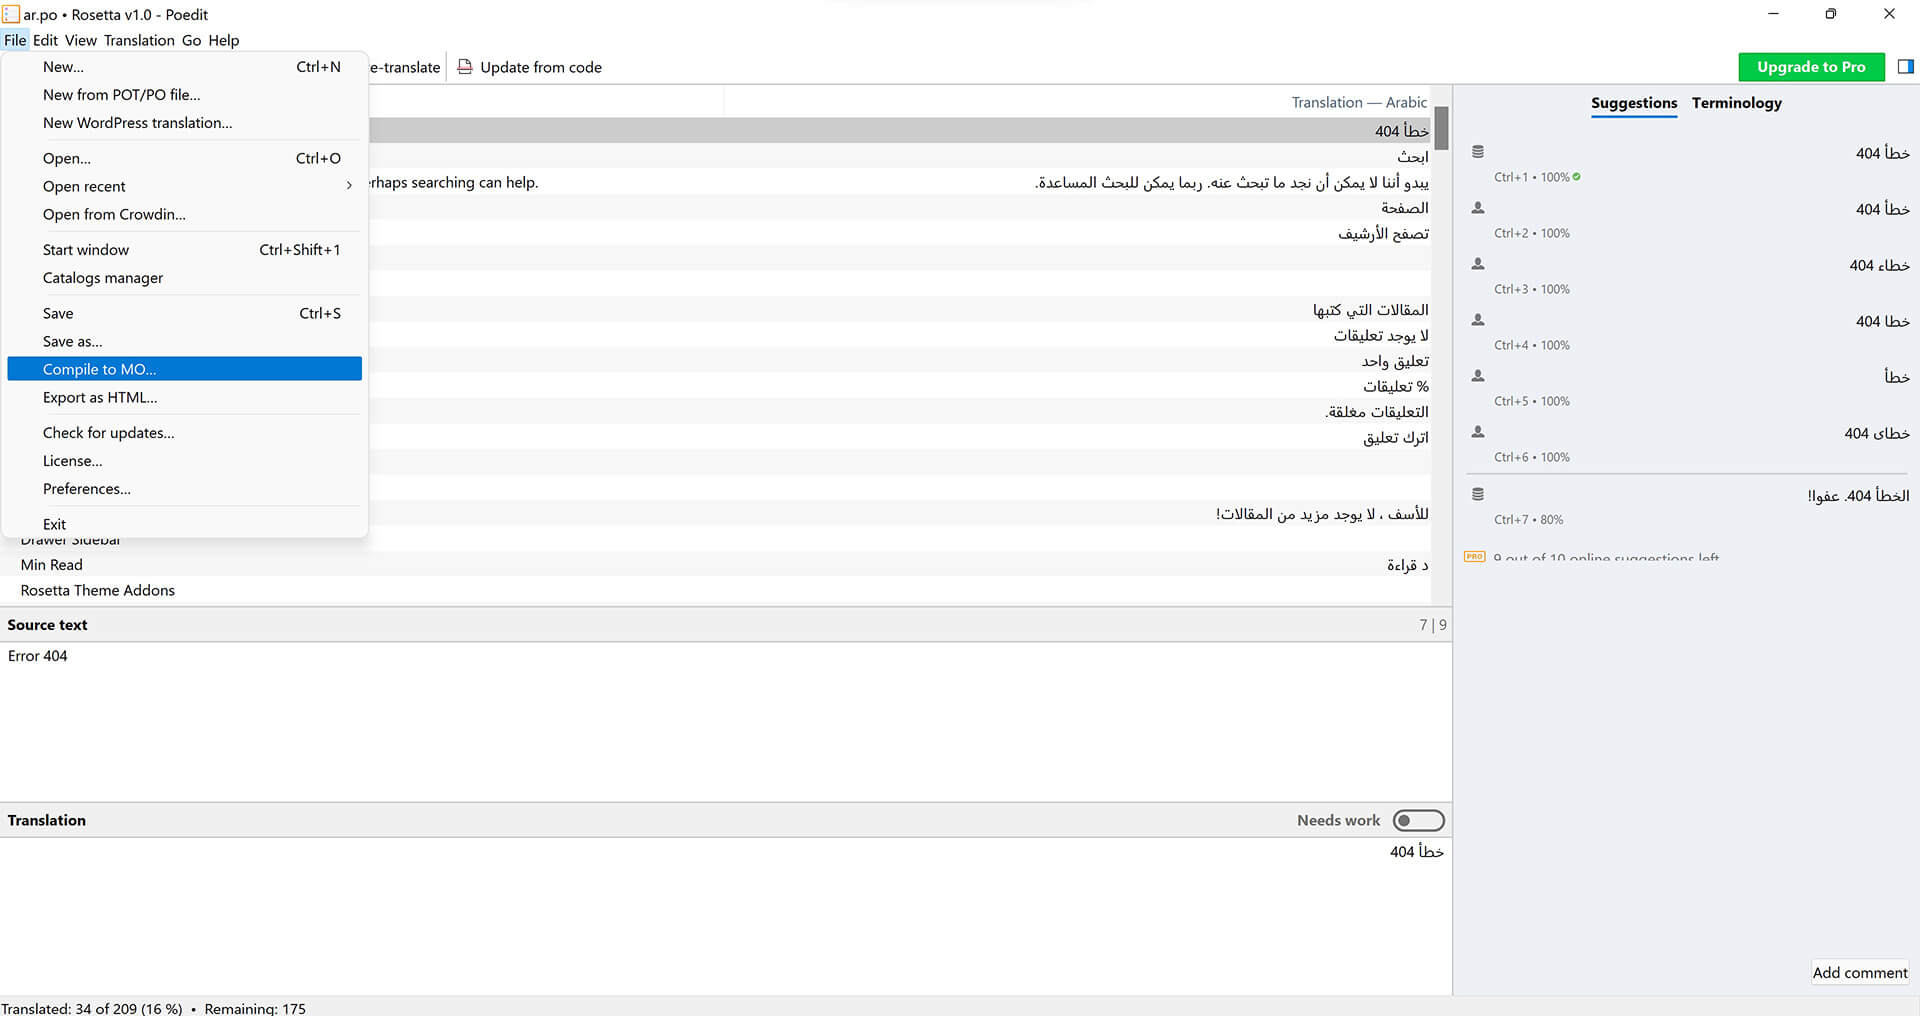
- Save .po file in same folder and compile file to .mo and save in same folder.
If French (France) it will be like that fr_FR.po fr_FR.mo
Check this link to name your file correctly depending on WordPress language: https://make.wordpress.org/polyglots/teams/
You will find correct name next to each language in WP Locale column. - Uplaod .po and .mo files to wp-content/themes/rosetta/languages/ directory using FTP.